Mode
si digital
Posted 30 November, 2015 by si digital in
Mode
Mode > Spider / List / SERP / Compare / APIs
Spider Mode
This is the default mode of the SEO Spider. In this mode the SEO Spider will crawl a web site, gathering links and classifying URLs into the various tabs and filters. Simply enter the URL of your choice and click ‘start’.
List Mode
In this mode you can check a predefined list of URLs. This list can come from a variety of sources – a simple copy and paste, or a .txt, .xls, .xlsx, .csv or .xml file. The files will be scanned for http:// or https:// prefixed URLs, all other text will be ignored. For example, you can directly upload an Adwords download and all URLs will be found automatically.

If you’re performing a site migration and wish to test URLs, we highly recommend using the ‘always follow redirects‘ configuration so the SEO Spider finds the final destination URL. The best way to view these is via the ‘redirect chains’ report, and we go into more detail within our ‘How To Audit Redirects‘ guide.
List mode changes the crawl depth setting to zero, which means only the uploaded URLs will be checked. If you want to check links from these URLs, adjust the crawl depth to 1 or more in the ‘Limits’ tab in ‘Configuration > Spider’. List mode also sets the spider to ignore robots.txt by default, we assume if a list is being uploaded the intention is to crawl all the URLs in the list.
If you wish to export data in list mode in the same order it was uploaded, then use the ‘Export’ button which appears next to the ‘upload’ and ‘start’ buttons at the top of the user interface.

The data in the export will be in the same order and include all of the exact URLs in the original upload, including duplicates or any fix-ups performed.
If you’d like to learn how to perform more advancing crawling in list mode, then read our how to use list mode guide.
SERP Mode
In this mode you can upload page titles and meta descriptions directly into the SEO Spider to calculate pixel widths (and character lengths!). There is no crawling involved in this mode, so they do not need to be live on a website.
This means you can export page titles and descriptions from the SEO Spider, make bulk edits in Excel (if that’s your preference, rather than in the tool itself) and then upload them back into the tool to understand how they may appear in Google’s SERPs.
Under ‘reports’, we have a new ‘SERP Summary’ report which is in the format required to re-upload page titles and descriptions. We simply require three headers for ‘URL’, ‘Title’ and ‘Description’.
For example –
You can upload in a .txt, .csv or Excel file.
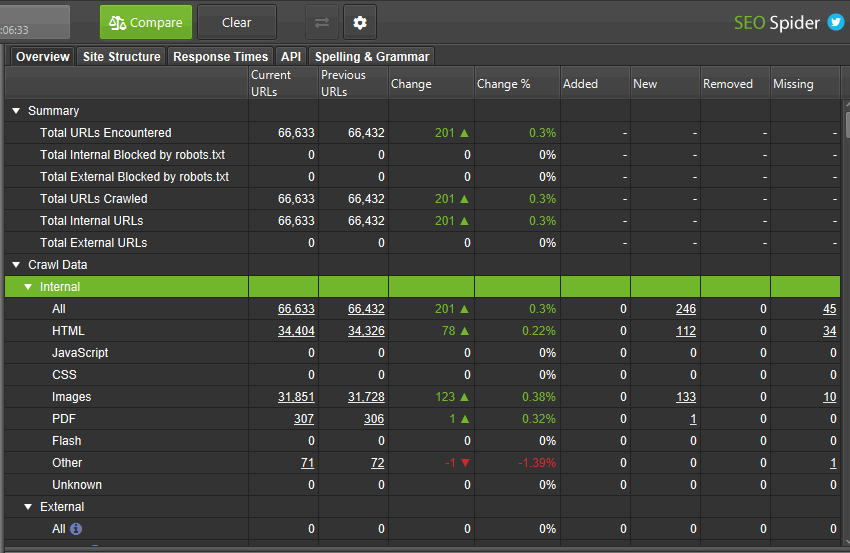
Compare Mode
This mode allows you to compare two crawls and see how data has changed in tabs and filters over time. Please see how tutorial on ‘How To Compare Crawls’ for a walk-through guide.
The compare feature is only available in database storage mode with a licence. If you haven’t already moved, it’s as simple as ‘File > Settings > Storage Mode’ and choosing ‘Database Storage’.
There are two options to compare crawls –
1) Switch to ‘compare’ mode via ‘Mode > Compare’ and click ‘Select Crawl’ via the top menu to pick two crawls you wish to compare.

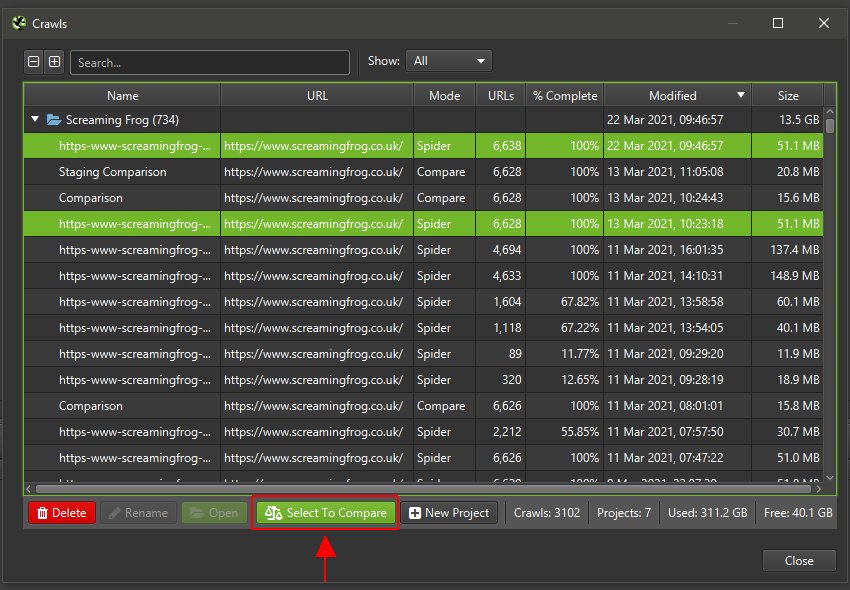
2) When in ‘Spider’ or ‘List’ modes go to ‘File > Crawls’, highlight two crawls, and ‘Select To Compare’, which will switch you to ‘compare’ mode.
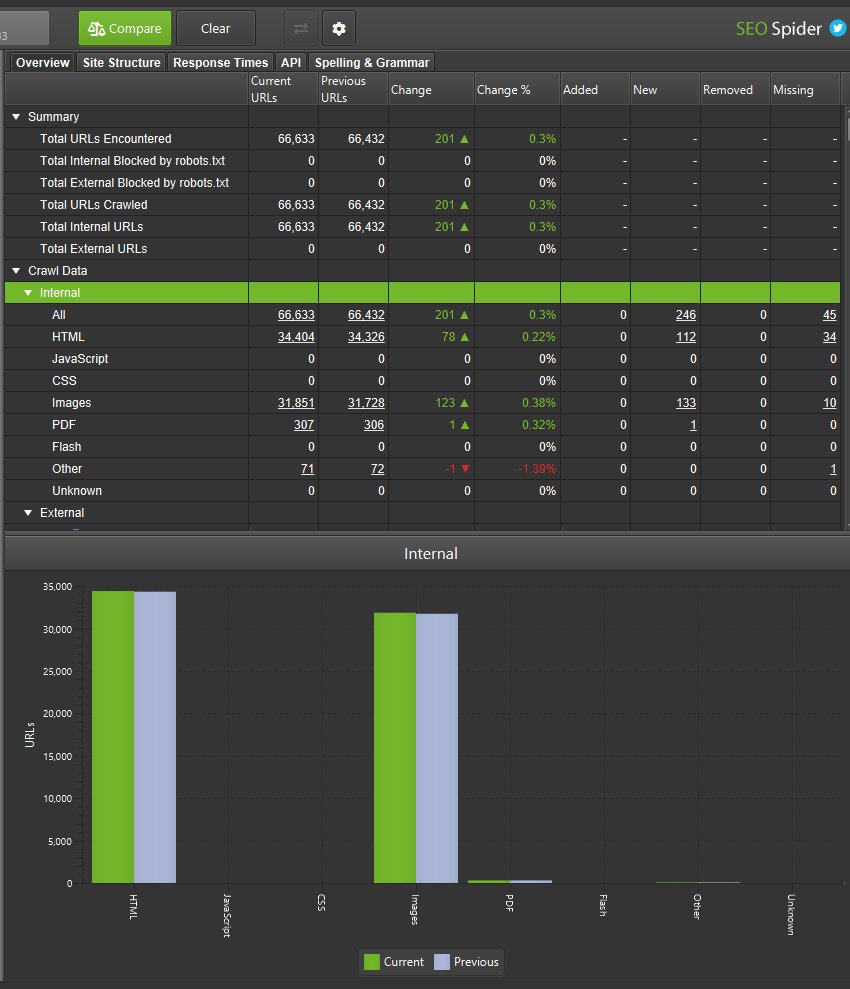
You can then adjust the compare configuration via the ‘cog’ icon, or clicking ‘Config > Compare’. This allows you to select additional elements to analyse for change detection.
Then click ‘Compare’ for the crawl comparison analysis to run and the right hand overview tab to populate and show current and previous crawl data with changes.
You’re able to click on the numbers in the columns to view which URLs have changed, and use the filter on the master window view to toggle between current and previous crawls, or added, new, removed or missing URLs.
There are four columns and filters that help segment URLs that move into tabs and filters.
Added – URLs in previous crawl that moved to filter of current crawl.
New – New URLs not in the previous crawl, that are in current crawl and fiter.
Removed – URLs in filter for previous crawl, but not in filter for current crawl.
Missing – URLs not found in the current crawl, that previous were in filter.
Essentially ‘added’ and ‘removed’ are URLs that exist in both current and previous crawls, whereas ‘new’ and ‘missing’ are URLs that only exist in one of the crawls.
When you have completed a crawl comparison, a small comparison file is automatically stored in ‘File > Crawls’, which allows you to open and view it without running the analysis again.
This file utilises the two crawls compared. Therefore they are both required to be stored to view the comparison. Deleting one or both of the crawls in the comparison will mean the comparison will not be accessible anymore.
Please refer to our tutorial on ‘How To Compare Crawls‘ for more.
APIs Mode
APIs mode allows you to upload URLs and pull data from any APIs, without any crawling involved for speed.
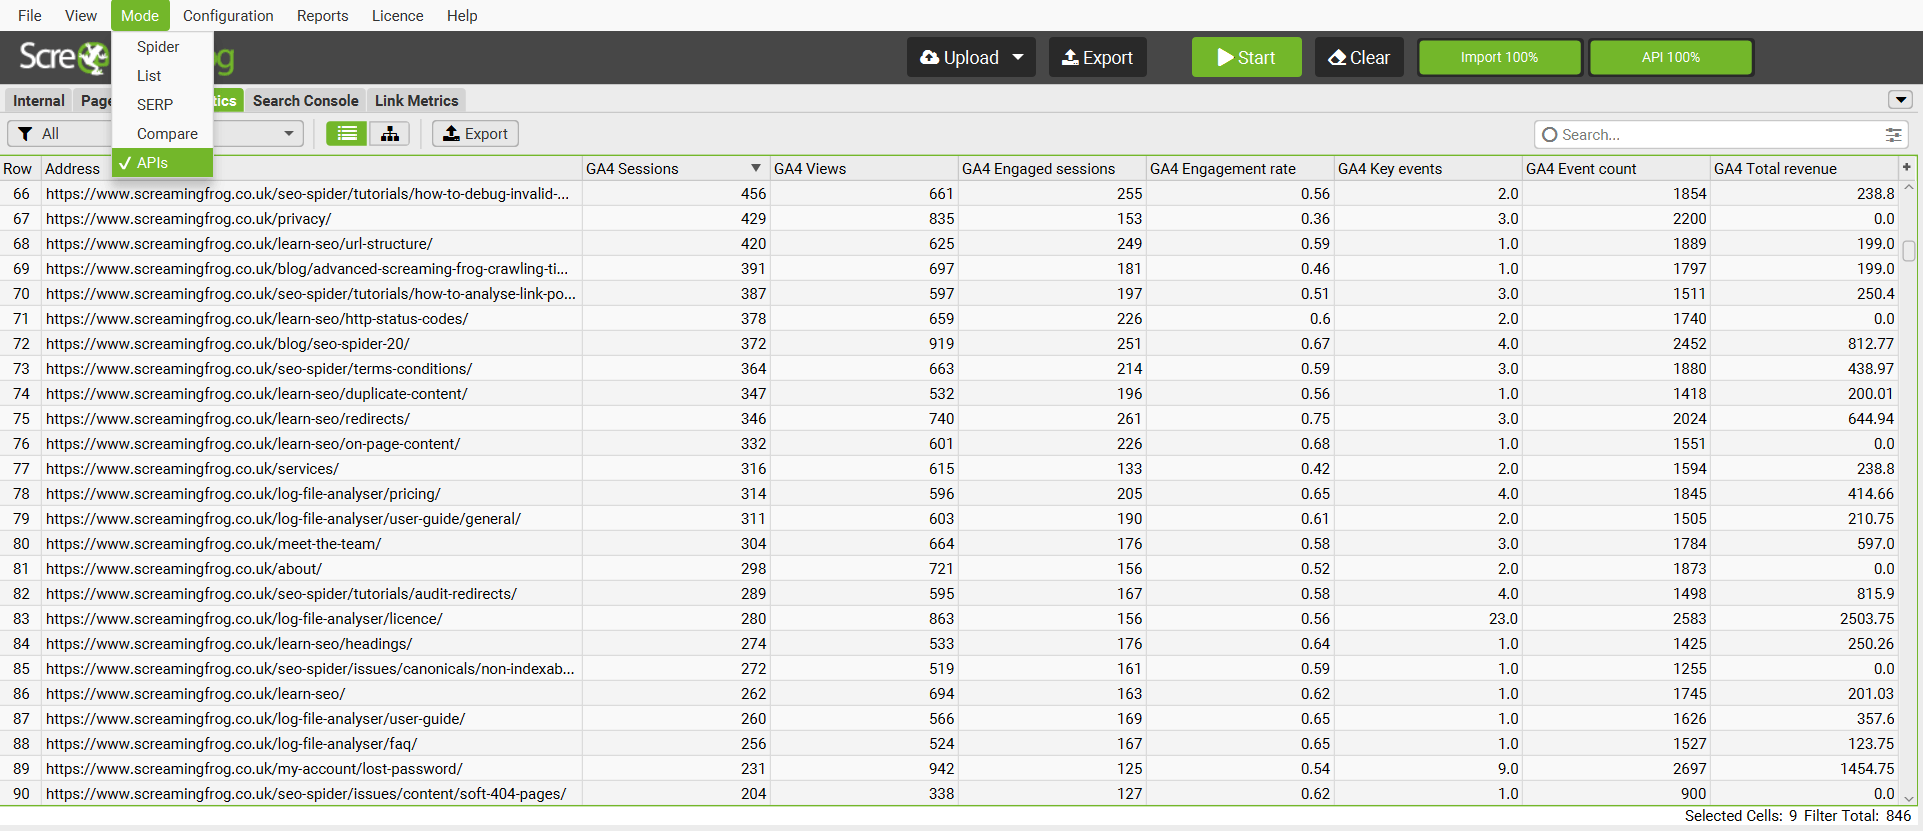
It allows you to connect to Google Analytics, Search Console, PageSpeed Insights, Majestic, Ahrefs and Moz.


