
SEO Spider
How To Connect The SEO Spider MCP To ChatGPT Using An OpenAI Tunnel
Introduction
The Screaming Frog SEO Spider MCP Server lets AI assistants run crawls, analyse data and export reports directly from the SEO Spider. ChatGPT can only connect to remote MCP servers, so it can’t reach the SEO Spider running on your own machine directly.
OpenAI’s Secure MCP Tunnel solves this. A small client on your machine makes an outbound connection to OpenAI, so ChatGPT can reach the SEO Spider without it being exposed to the public internet. There are no open ports, no public URLs and no domain or DNS set-up.
This tutorial shows how to connect the SEO Spider MCP to ChatGPT using an OpenAI tunnel.
Requirements
- The SEO Spider with the MCP Server enabled.
- An OpenAI Platform organisation, with permission to create tunnels (Tunnels Read and Manage).
- A ChatGPT workspace where you can add custom MCP servers (developer mode).
- Node.js installed, to run the mcp-remote bridge.
1) Start the SEO Spider MCP Server
Click ‘File > Settings > MCP Server’, enable the Node.js runtime environment, and click ‘Start MCP Server’.
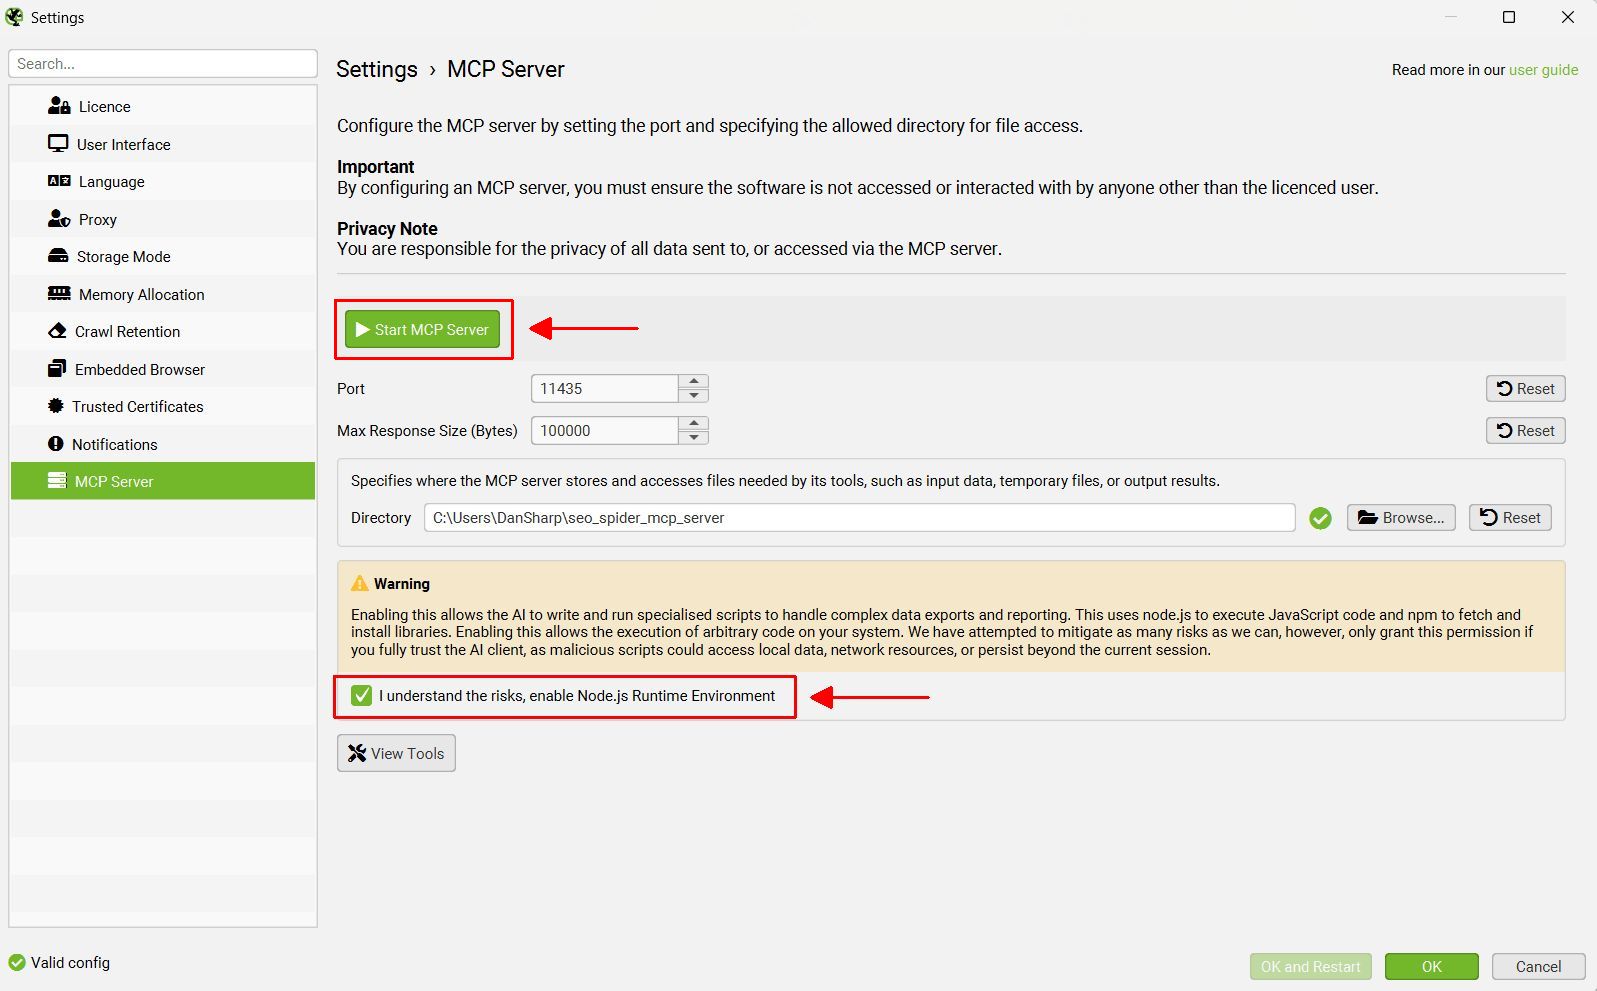
The MCP Server will run in Streamable HTTP mode at http://localhost:11435/mcp. The SEO Spider must stay open with the MCP Server running whenever you use it from ChatGPT.
2) Create a Tunnel in the OpenAI Platform
Go to the tunnels page in the OpenAI Platform and create a new tunnel.
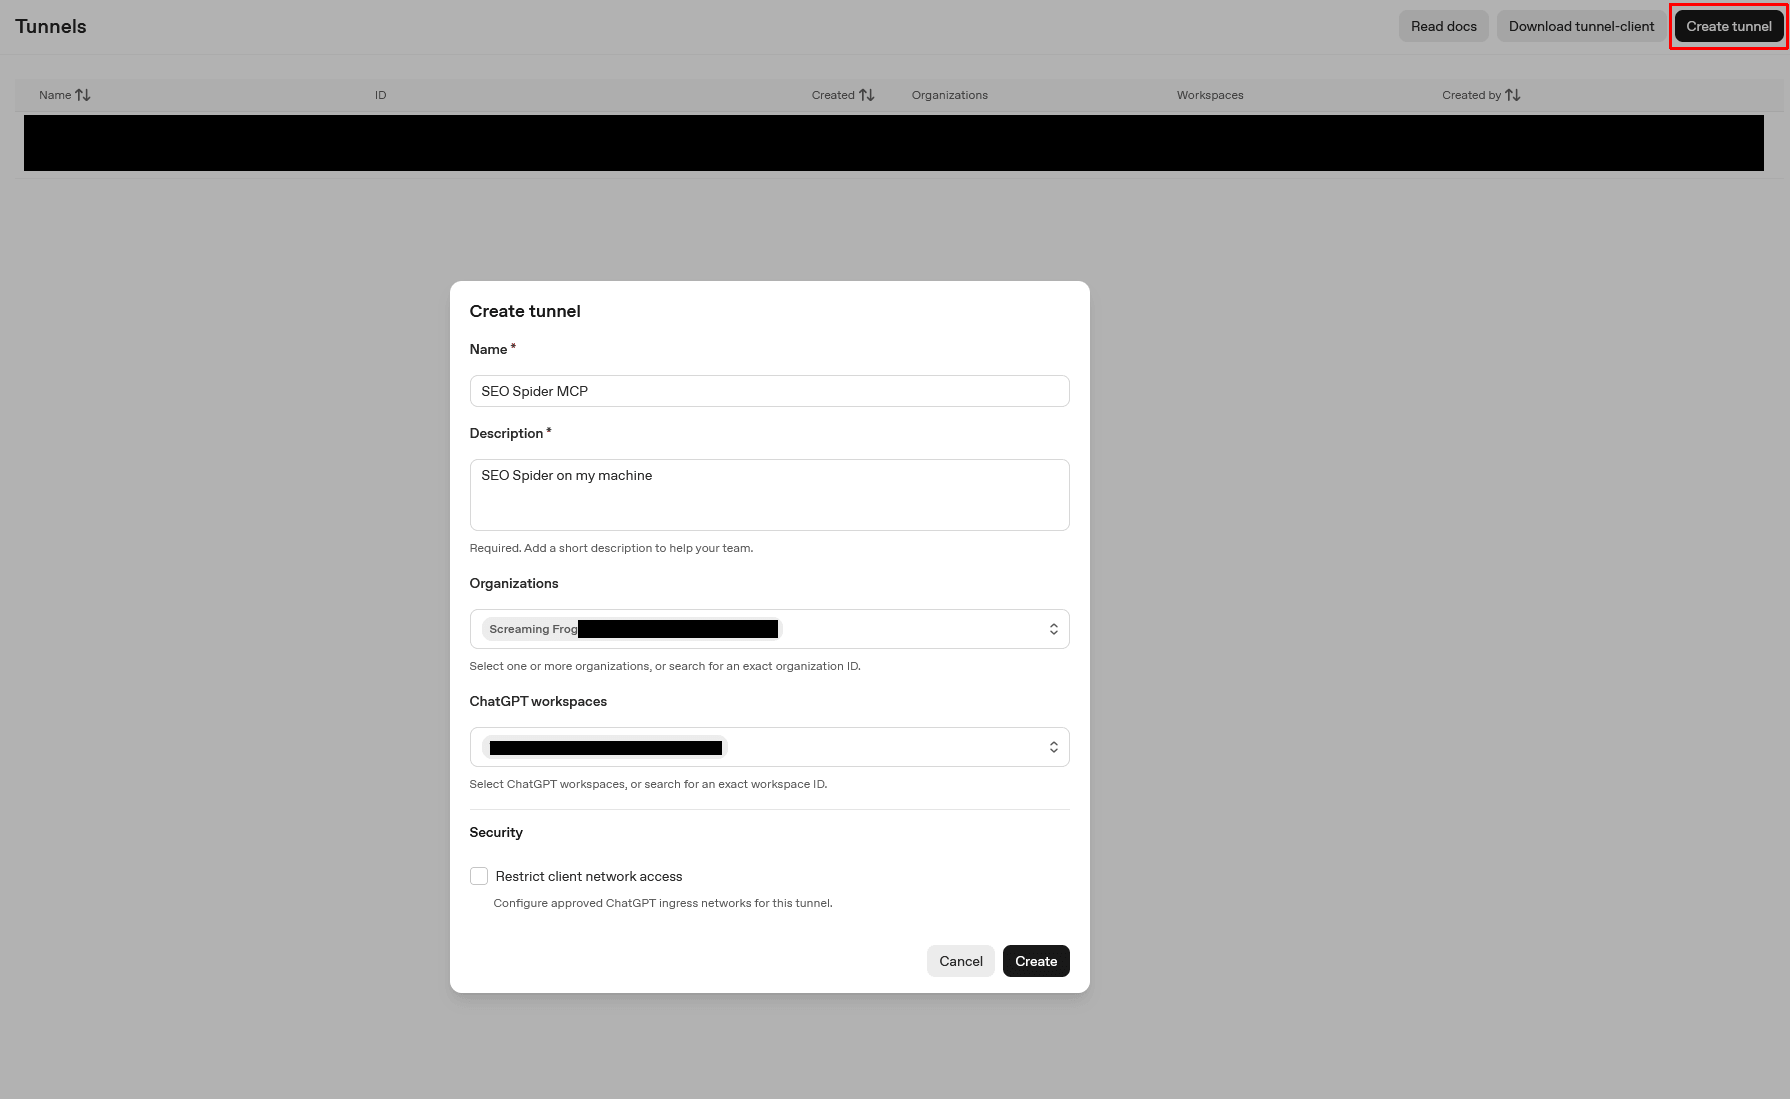
- Name – For example, ‘SEO Spider’.
- Description – A short note, such as which machine it runs on.
- Organizations – Your OpenAI organisation.
- ChatGPT workspaces – Select the workspace you’ll use ChatGPT in. If this is left empty, the tunnel may not appear in ChatGPT.
Click ‘Create’ and copy the tunnel ID, which starts with tunnel_.
3) Create a Runtime API Key
The tunnel client needs an API key to connect to OpenAI. Create one on the API keys page and copy it somewhere safe.
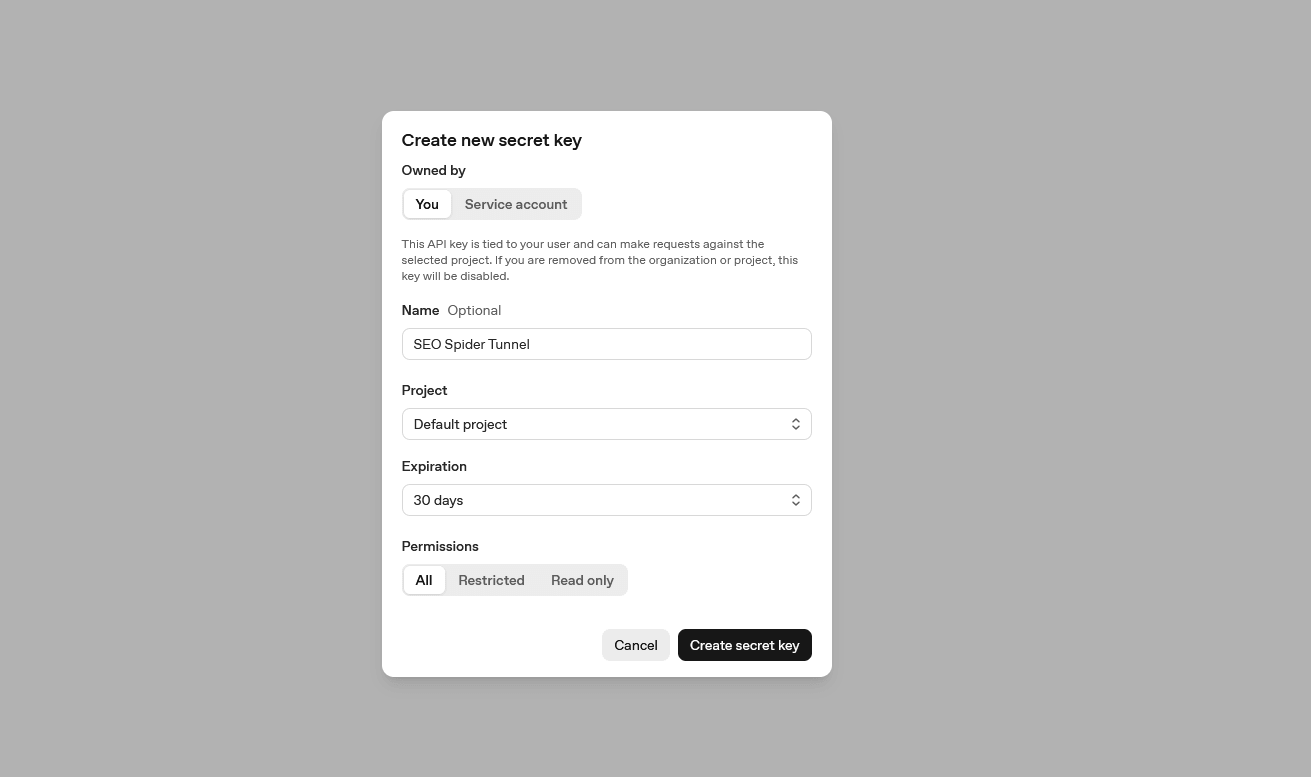
Treat this key like a password. Don’t share it or paste it into chats, as anyone with it can use your OpenAI organisation’s API.
Create a key just for the tunnel, rather than reusing an existing key or an admin key. If your organisation allows restricted keys, limit it to the ‘Tunnels Read + Use’ permissions, so a leaked key can’t be used for anything else.
4) Download the Tunnel Client
Download OpenAI’s tunnel-client for your operating system from the releases page of the official repository, and extract it to a folder.
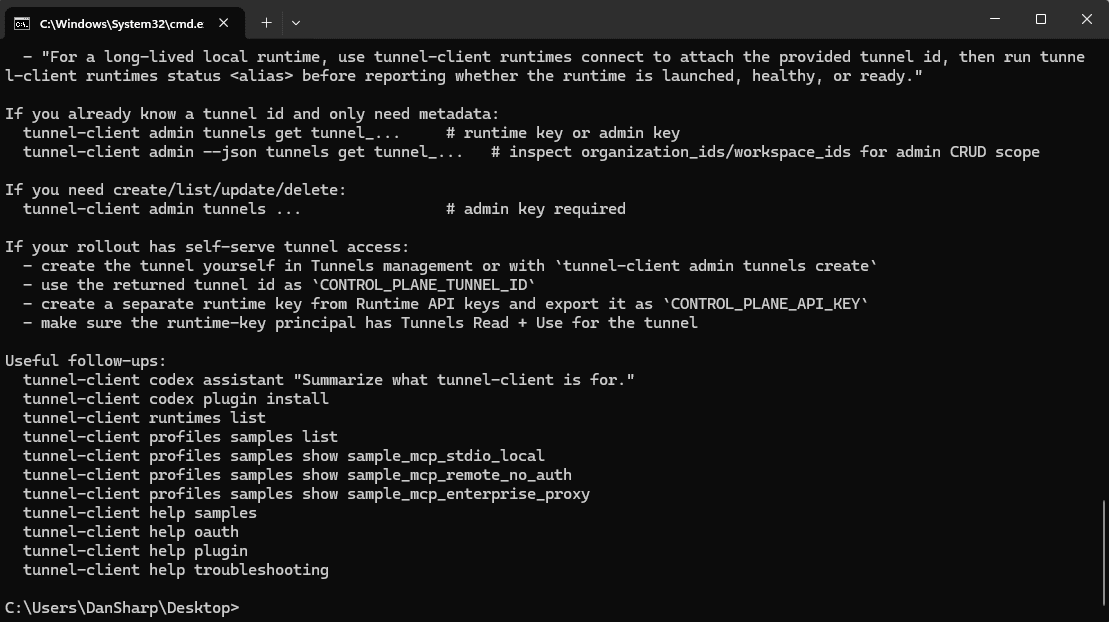
On Windows, open a Command Prompt in that folder. The quickest way is to click the File Explorer address bar, type cmd and press Enter. Check it runs with –
tunnel-client.exe help quickstart
5) Create the Tunnel Profile
Create a profile that connects the tunnel to the SEO Spider. Enter the following into the command prompt, but replace tunnel_YOURID with your tunnel ID –
tunnel-client.exe init --profile seo-spider --sample sample_mcp_stdio_local --tunnel-id tunnel_YOURID --mcp-command "npx -y mcp-remote http://localhost:11435/mcp --allow-http"
This uses the mcp-remote bridge to connect to the SEO Spider’s local MCP Server. Don’t point the tunnel client directly at the SEO Spider’s URL with --mcp-server-url. When you do, it uses a profile that expects the MCP server to handle OAuth sign-in itself, which the SEO Spider doesn’t, so the tunnel won’t connect to ChatGPT.
6) Set the API Key and Check the Set-Up
Save the API key as an environment variable, so the tunnel client can use it whenever it runs. On Windows –
setx CONTROL_PLANE_API_KEY your-key-here
This only applies to new windows, so close Command Prompt and open a new one before continuing. To check it’s set, run if defined CONTROL_PLANE_API_KEY echo Key is set.
On macOS and Linux, add export CONTROL_PLANE_API_KEY=your-key-here to your shell profile, such as ~/.zshrc, then open a new terminal.
The key is stored in plain text in your user environment, so only do this on a machine you trust. To use it for the current window only, use set CONTROL_PLANE_API_KEY=your-key-here instead, and repeat it each time you start the tunnel.
Then run the built-in checks –
tunnel-client.exe doctor --profile seo-spider --explain
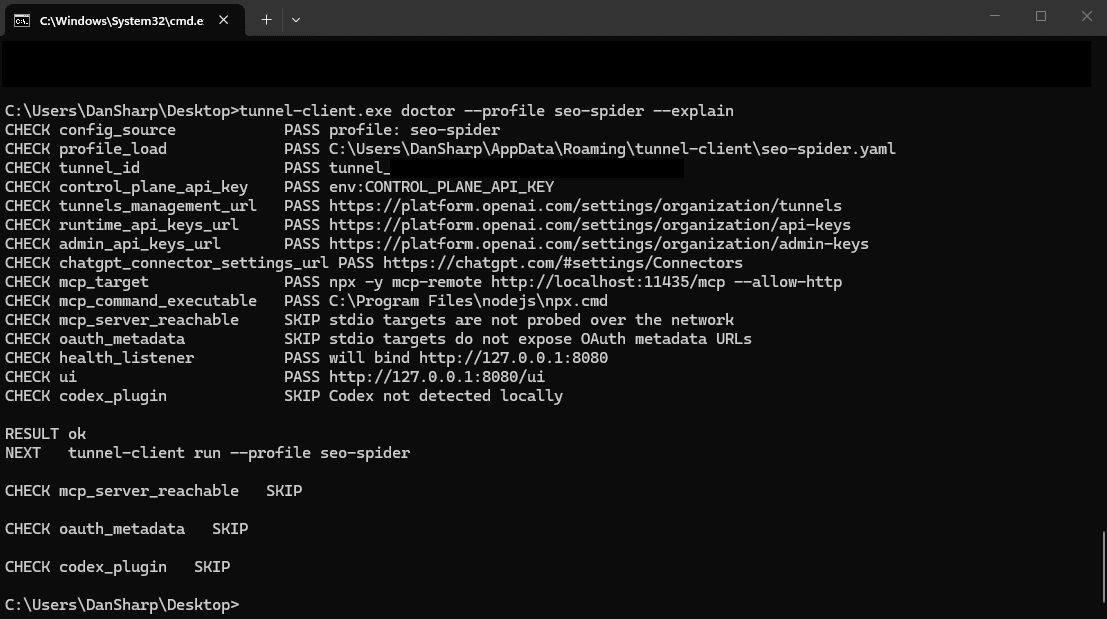
More Secure Option (Windows)
Instead of saving the key in plain text with setx, you can store it encrypted to your Windows account using PowerShell. The key is only decrypted when the tunnel starts, and only for the tunnel client.
Open PowerShell and run the following once. Paste your API key when prompted. It won’t be shown on screen –
Read-Host "Paste API key" -AsSecureString | ConvertFrom-SecureString | Set-Content "$env:APPDATA\tunnel-client\key.enc"
This creates an encrypted key file that can only be decrypted by your Windows user account on this machine.
Then create a file called start-seo-spider-tunnel.ps1 on your desktop containing the following –
$secure = Get-Content "$env:APPDATA\tunnel-client\key.enc" | ConvertTo-SecureString

$env:CONTROL_PLANE_API_KEY = [System.Net.NetworkCredential]::new('', $secure).Password

& "$env:USERPROFILE\Desktop\tunnel-client.exe" run --profile seo-spider
Adjust the path to wherever you saved tunnel-client.exe. To start the tunnel, right-click the file and select ‘Run with PowerShell’. If Windows blocks the script, run it from Command Prompt instead –
powershell -ExecutionPolicy Bypass -File "%USERPROFILE%\Desktop\start-seo-spider-tunnel.ps1"
If you previously saved the key with setx, remove the plain-text copy –
reg delete HKCU\Environment /v CONTROL_PLANE_API_KEY /f
If you run the checks again after switching to this option, set the key for the current window first, as it’s no longer saved in your environment.
7) Start the Tunnel
Using the command prompt again, enter –
tunnel-client.exe run --profile seo-spider
Keep this window open. The tunnel must be running for ChatGPT to find and use the SEO Spider.
When you’ve finished, press Ctrl+C or close the window to stop the tunnel. ChatGPT can only control the SEO Spider while it’s running, so it’s best not to leave it on when you’re not using it.
8) Add the MCP Server in ChatGPT
In ChatGPT, go to ‘Plugins’, click ‘+’ and select ‘Add custom MCP server’.
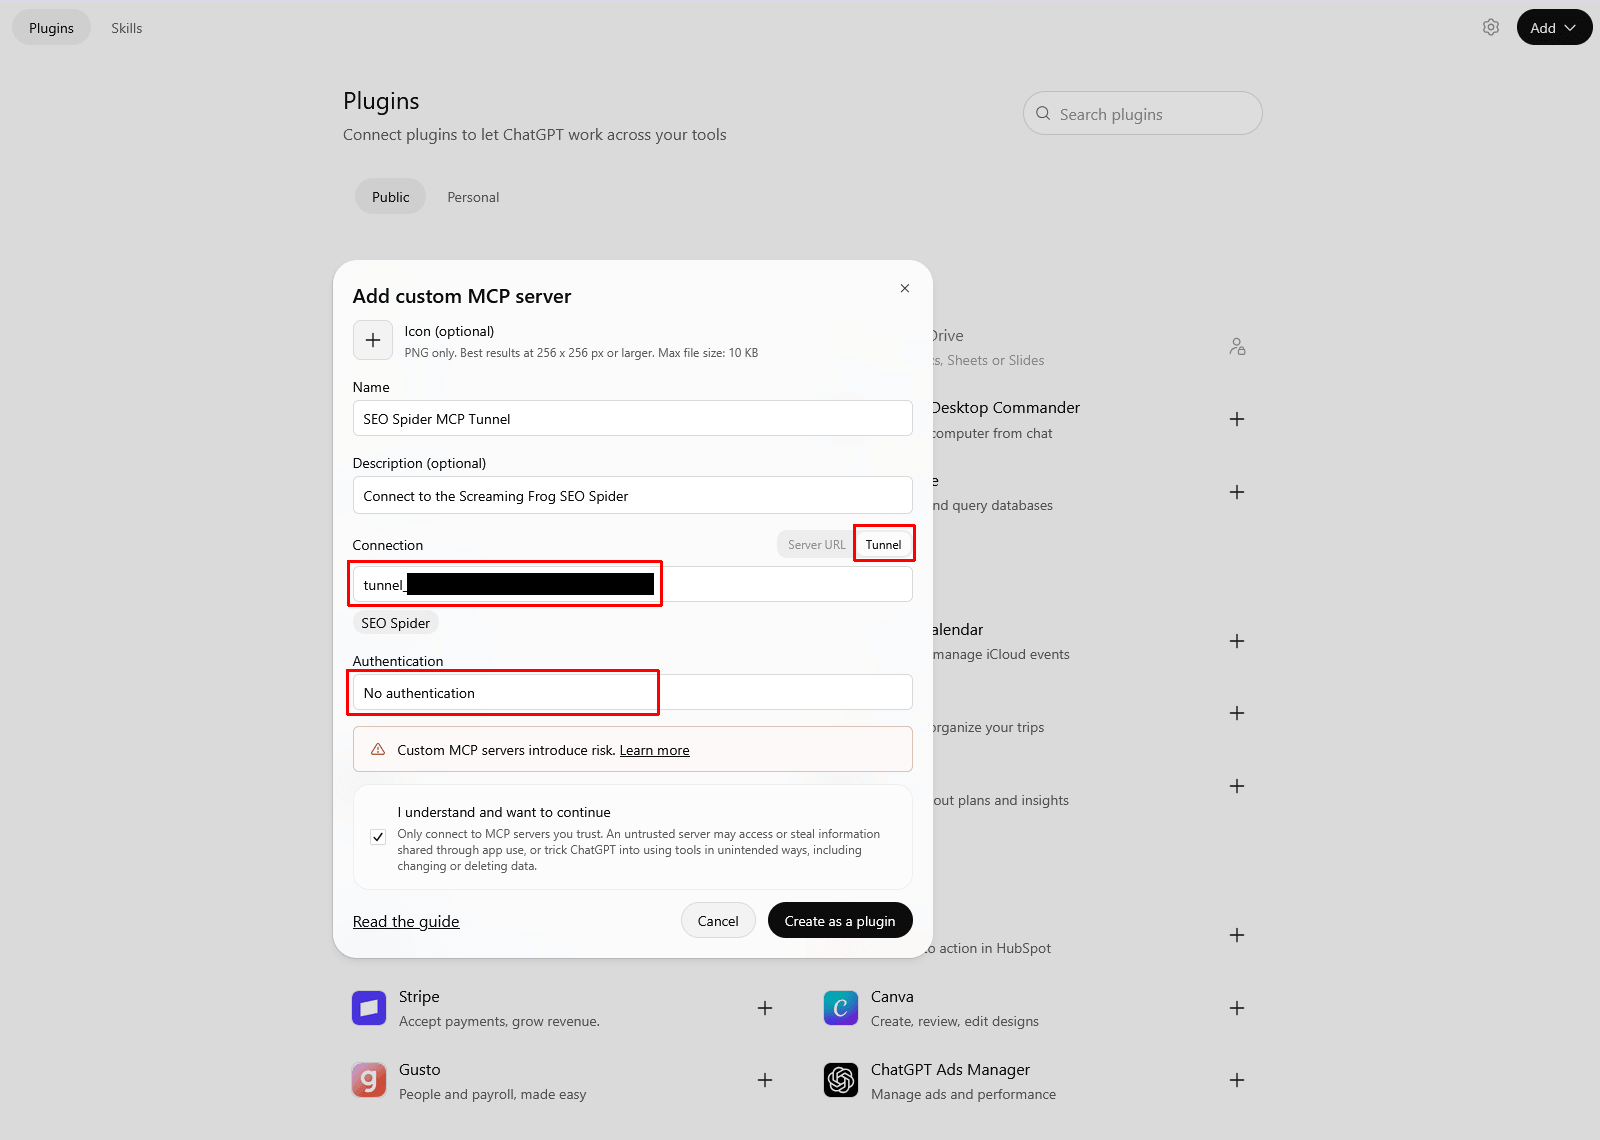
- Name – For example, ‘SEO Spider’.
- Connection – Select ‘Tunnel’, then enter the tunnel ID.
- Authentication – None. Access is controlled by your OpenAI organisation and workspace.
Accept the risk warning and create the plugin.
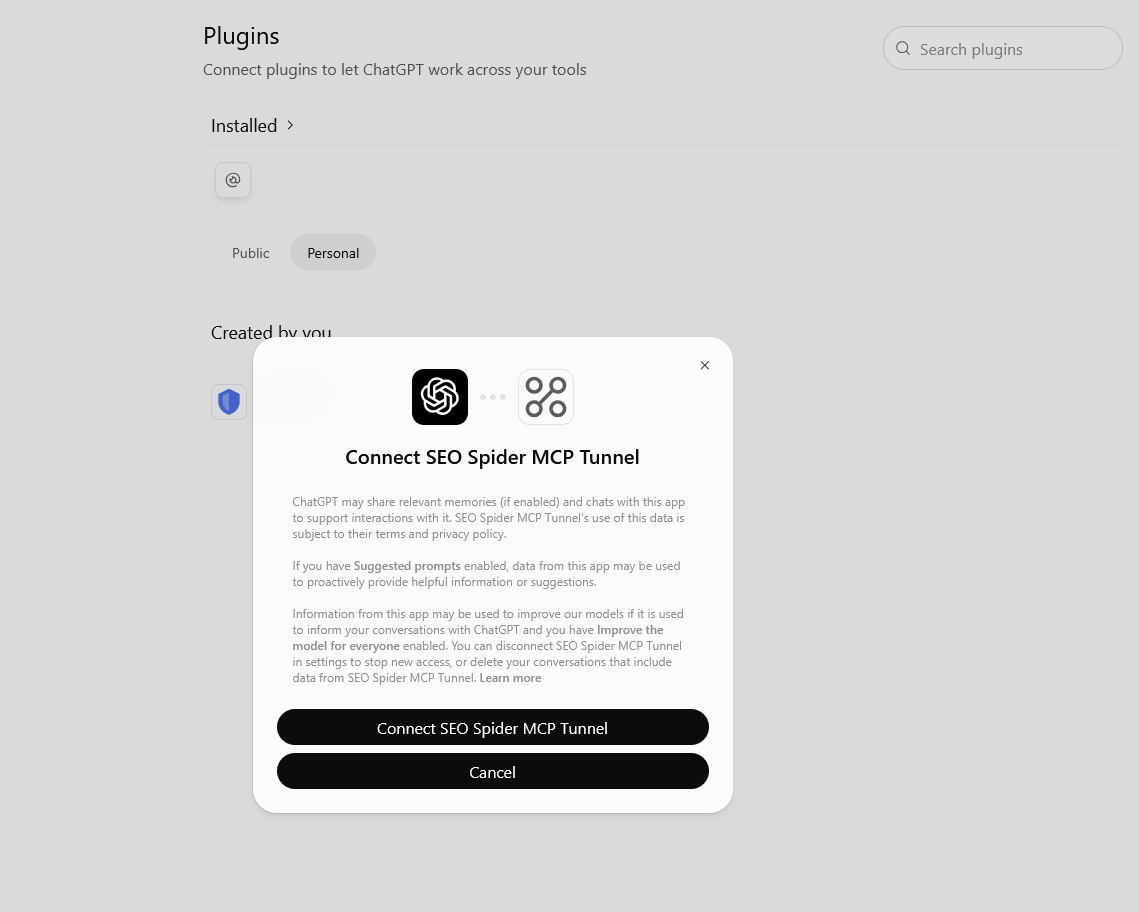
9) Test the Connection
Start a new chat, enable the SEO Spider plugin and try a simple request, such as ‘Crawl www.example.com using the SEO Spider’.
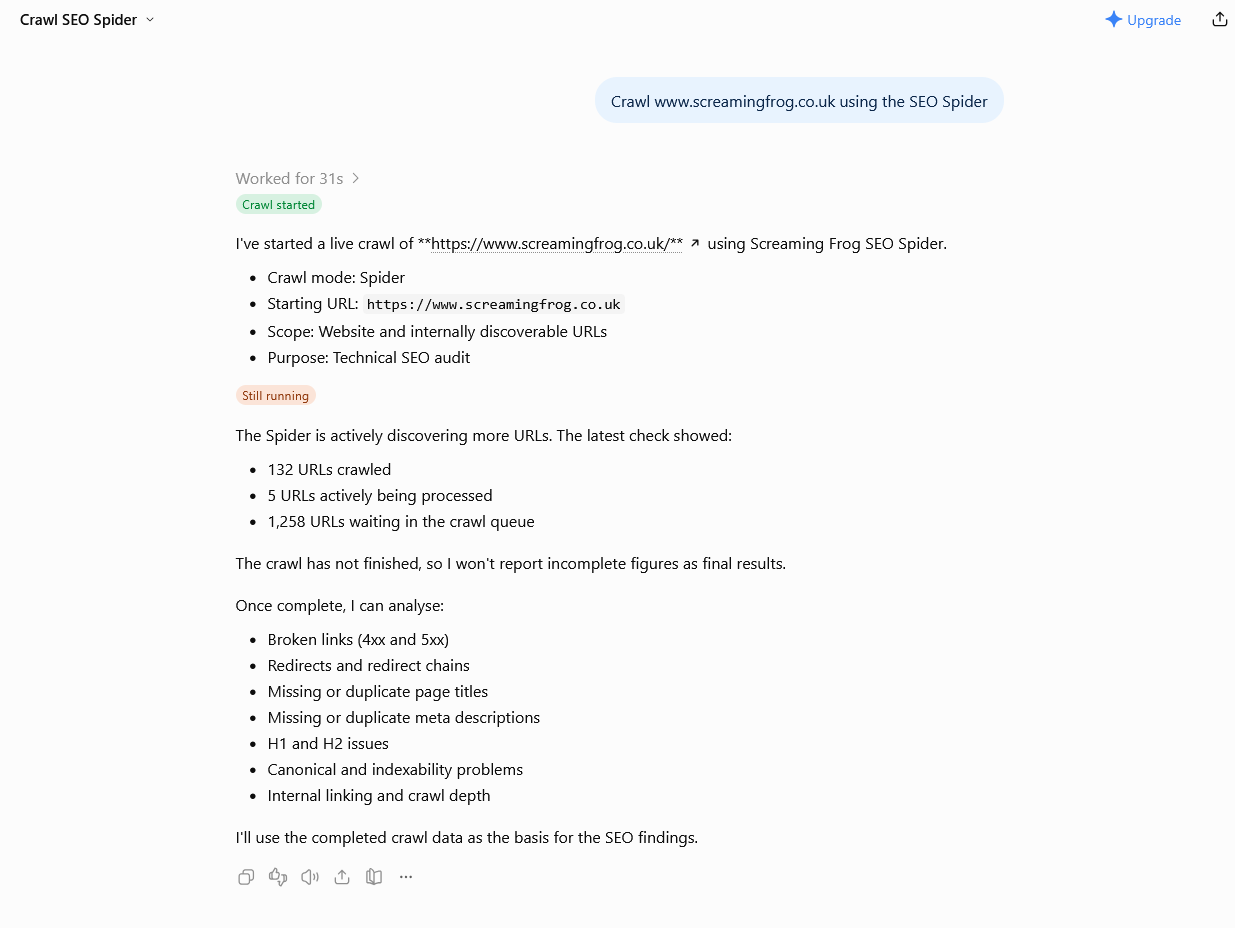
You should receive a positive response that ChatGPT has connected, and started the crawl. If you’re having problems, read on.
10) Start the Tunnel Next Time
The set-up only needs to be completed once. After restarting your machine, follow these steps to reconnect –
- Open the SEO Spider – Click ‘File > Settings > MCP Server’ and click ‘Start MCP Server’. If you enable ‘Auto-start MCP Server on application launch’, this step isn’t required.
- Start the tunnel – Open Command Prompt and run the tunnel client using its full path, so it works from any folder.
"%USERPROFILE%\Desktop\tunnel-client.exe" run --profile seo-spider
Adjust the path to wherever you saved tunnel-client.exe. Keep the window open while you use ChatGPT.
For a quicker start, create a file called start-seo-spider-tunnel.bat on your desktop containing the following, and double-click it to start the tunnel –
@echo off

"%USERPROFILE%\Desktop\tunnel-client.exe" run --profile seo-spider

pause
There’s no need to add the MCP server in ChatGPT again. Once the tunnel is running, start a new chat and enable the SEO Spider plugin.
The .bat file relies on the API key being saved with setx in step 6. Don’t add the API key to the .bat file, as it would be stored in plain text on your desktop.
If you used the more secure option in step 6, start the tunnel by running your start-seo-spider-tunnel.ps1 script instead.
Security
- Who can connect – The tunnel is limited to your OpenAI organisation and the selected workspace, but anyone in that workspace with developer mode may be able to add it. Keep the plugin private and limit who has developer mode.
- What the AI can do – MCP tools can write files and run scripts on your machine. Review tool calls before approving them, particularly after crawling unfamiliar websites, which may contain text designed to manipulate AI assistants.
- Where your data goes – Anything ChatGPT reads is sent to OpenAI, including crawl data, page content and data from connected APIs such as Search Console or Analytics. Check this fits your client agreements before crawling client websites.
- Pin the bridge version – npx -y mcp-remote fetches the latest version each time. For production use, pin a specific version, such as mcp-remote@x.y.z.
- Licensing – You must ensure the SEO Spider is only accessed by licensed users. Licences are per person. Each person connecting to the software requires their own licence.
- Removing access – To disconnect, or if a key or machine is compromised, remove the plugin in ChatGPT, delete the tunnel in the OpenAI Platform and revoke the API key. Then delete the saved key with reg delete HKCU\Environment /v CONTROL_PLANE_API_KEY /f, or delete key.enc if you used the more secure option.
Support
This tutorial should help users connect the SEO Spider MCP to ChatGPT using an OpenAI tunnel. If you run into problems, check the common issues below –
- ‘oauth_metadata’ check fails, or ‘control-plane polling disabled’ – The profile was created without --sample sample_mcp_stdio_local. Re-run step 5 with --force added.
- ‘control_plane_api_key’ check fails – The API key isn’t available in the current window. If you’ve just run setx, close Command Prompt and open a new one. If you used set, repeat it in the same window you use for run.
- ‘npx’ is not recognised – Install Node.js, then open a new Command Prompt.
- ‘App setup was rate limited’ in ChatGPT – Check the tunnel is running, then wait a few minutes before trying again.
- ‘mcp probe timed out’ – Check the SEO Spider is open, the MCP Server is started, and no crawl or export is in progress.
For more detail, check out the following guides –
Alternatively please contact us via support and we can help.
This documentation is subject to our Terms of Use.


