Exporting
si digital
Posted 27 November, 2015 by si digital in
Exporting
You can export all data from a crawl, including bulk exporting inlink and outlink data. There are three main methods to export data outlined below.
Exporting Tabs & Filters (Top Window Data)
Simply click the ‘export’ button in the top left hand corner to export data from the top window tabs and filters.

The export function in the top window section works with your current field of view in the top window. Hence, if you are using a filter and click ‘export’ it will only export the data contained within the filtered option.
Exporting Lower Window Data
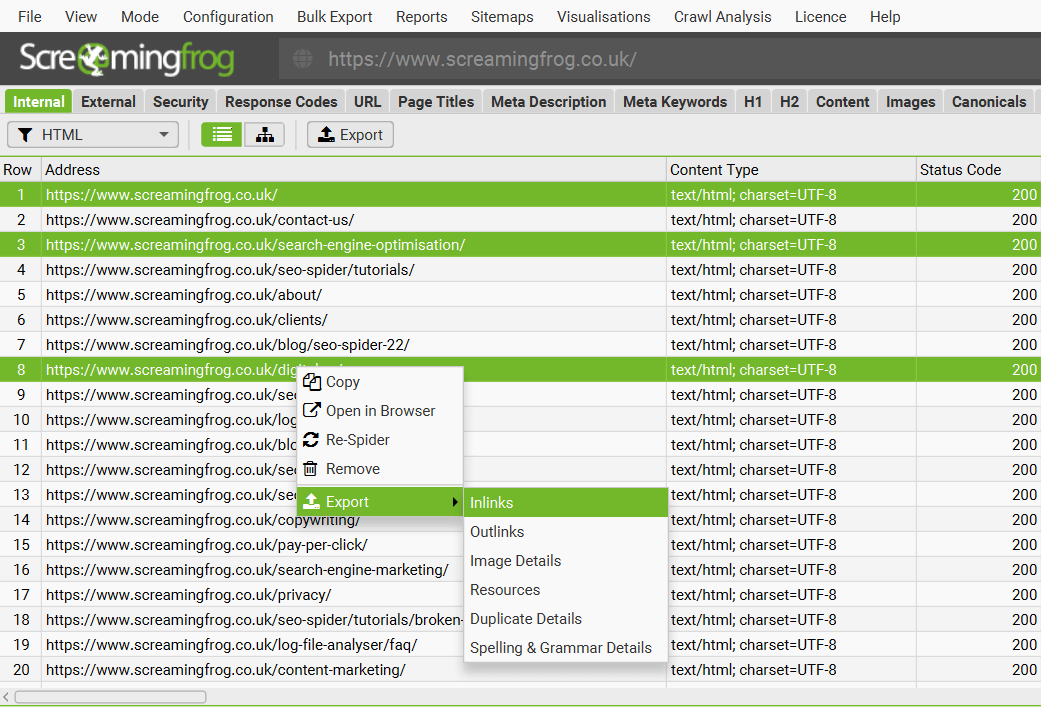
To export lower window data, simply right click on the URL that you wish to export data from in the top window, then click on one of the options.
Details from the following lower window tabs can be exported in this way:
- URL Details
- Inlinks
- Outlinks
- Image Details
- Resources
- Duplicate Details
- Structured Data Details
- Spelling & Grammar Details
- Crawl Path Report

This data can also be exported from the ‘Export’ button found in the lower window tab:

You can also multi-select URLs (by holding control or shift on your keyboard) and export data in bulk for these URLs as well. For example, you can bulk export the ‘inlinks’ to specific URLs of interest together in an export the same way.
Bulk Export
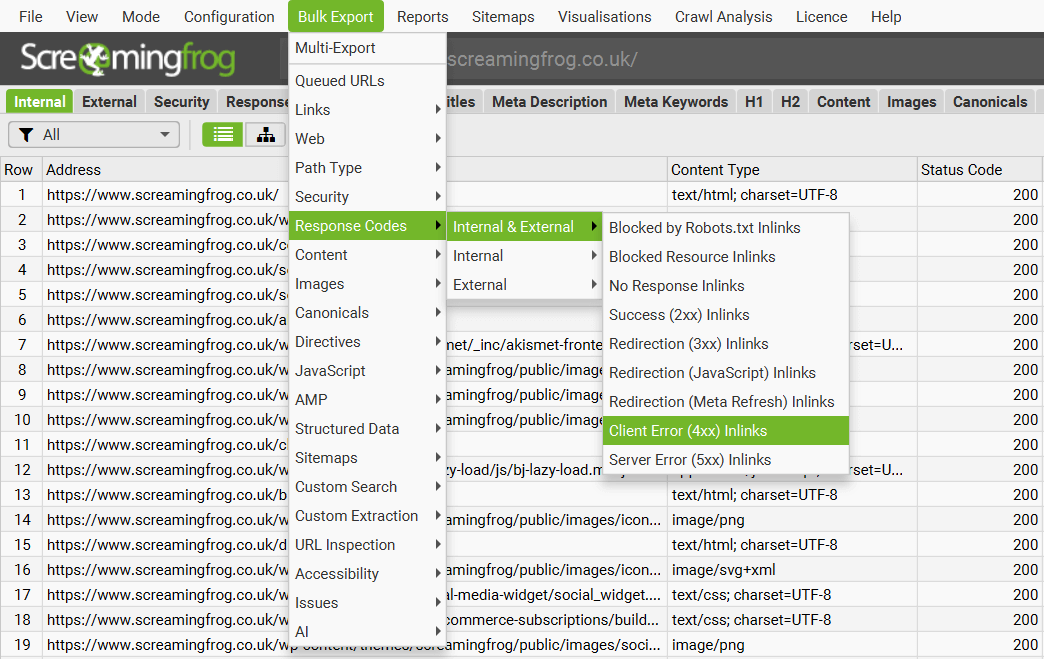
The ‘Bulk Export’ is located under the top level menu and allows bulk exporting of all data. You can export all instances of a link found in a crawl via the ‘All inlinks’ option, or export all inlinks to URLs with specific status codes such as 2XX, 3XX, 4XX or 5XX responses.
For example, selecting the ‘Client Error 4XX Inlinks’ option will export all inlinks to all error pages (such as 404 error pages). You can also export all image alt text, all images missing alt text and all anchor text across the site.
Check out our video guide on exporting.
Bulk Export Options
The following export options are available under the ‘bulk export’ top level menu.
- Queued URLs: These are all URLs that have been discovered that are in the queue to be crawled. This will approx. match the number of ‘remaining’ URLs in the bottom right hand corner of the GUI.
- Links > All Inlinks: Links to every URL the SEO Spider encountered while crawling the site. This contains every link to all the URLs (not just ahref, but also to images, canonical, hreflang, rel next/prev etc) in the All filter of the Response Codes tab.
- Links > All Outlinks: All links the SEO Spider encountered during crawling. This will contain every link contained in every URL in the Response Codes tab in the ‘All’ filter.
- Links > All Anchor Text: All ahref links to URLs in the All filter in the ‘Response Codes’ tab.
- Links > External Links: All links to URLs found under the All filter of the External tab.
- Links > Internal Nofollow Outlinks: Pages that use internal nofollow outlinks as seen under the ‘Links’ tab.
- Links > Internal Outlinks With No Anchor Text: Pages that have internal outlinks with no anchor text as seen under the ‘Links’ tab.
- Links > Non-Descriptive Anchor Text In Internal Outlinks: Pages that have Non-Descriptive Anchor Text In Internal Outlinks as seen under the ‘Links’ tab.
- Links > Follow & Nofollow Internal Inlinks To Page: Pages that have Follow & Nofollow Internal Inlinks To Page as seen under the ‘Links’ tab.
- Links > Internal Nofollow Inlinks Only: Pages that have Nofollow Inlinks Only as seen under the ‘Links’ tab.
- Links > Outlinks to Localhost: Pages that contain links that reference Localhost as seen under the ‘Links’ tab.
- Web > Screenshots: An export of all the screenshots seen in the ‘Rendered Page‘ lower window tab, stored when using JavaScript rendering mode.
- Web > Archived Website: An export of all website files stored when using the archive website feature.
- Web > All Page Source: The static HTML source or rendered HTML of crawled pages. Rendered HTML is only available when in JavaScript rendering mode.
- Web > All Page Text: An export of page text from every internal HTML page with a 200 response as separate .txt files.
- Web > All HTTP Headers: All URLs and their corresponding HTTP response headers. ‘HTTP Headers‘ must be enabled to be extracted via ‘Config > Spider > Extraction’ for this to be populated.
- Web > All Cookies: All URLs and every cookie issued in a crawl. ‘Cookies‘ must be enabled to be extracted via ‘Config > Spider > Extraction’ for this to be populated. JavaScript rendering mode will also need to be configured to get an accurate view of cookies loaded on the page using JavaScript or pixel image tags.
- Path Type: This will export specific path type links with their source pages they are linked from. Path type can include absolute, protocol-relative, root-relative and path-relative links.
- Security: All links to the URLs in the corresponding filter of the Security tab. e.g. Links to all the pages on the site that contain ‘Unsafe Cross-Origin Links’.
- Response Codes: All links to the URLs in the corresponding filter of the Response Codes tab. e.g. All source links to URLs that respond with 404 errors on the site.
- Content: All links to the URLs in the corresponding filter of the Content tab. e.g. Near Duplicates and all their corresponding near duplicate URLs over the chosen similarity threshold.
- Images: All references to the image URLs in the corresponding filter of the Images tab. e.g. All the references to images that are missing alt text.
- Canonicals: All links to the URLs in the corresponding filter of the Canonicals tab. e.g. Links to URLs which have missing canonicals.
- Directives: All links to the URLs in the corresponding filter of the Directives tab. e.g. Links to all the pages on the site that contain a meta robots ‘noindex’ tag.
- AMP: All links to the URLs in the corresponding filter of the AMP tab. e.g. Pages which have amphtml links with non-200 responses.
- Structured Data: All links to the URLs in the corresponding filter of the Structured Data tab. e.g. Links to URLs with validation errors. The RDF web data format is a series of triples (subject, predicate, object) statements. This is how the bulk report is structured. The hierarchical format of JSON-LD does not fit into a spreadsheet format; whereas statements of triples does.
- Sitemaps: All references to the image URLs in the corresponding filter of the Sitemaps tab. e.g. All XML Sitemaps which contain non-indexable URLs.
- Custom Search: All links to the URLs in the corresponding filter of the Custom Search tab. e.g. Links to all the pages on the site that matched a Custom Search.
- Custom Extraction: All links to the URLs in the corresponding filter of the Custom Extraction tab. e.g. Links to pages with a particular data extraction as set up in Custom Extraction.
- URL Inspection: This includes granular ‘Rich Results’, ‘Referring Pages’ and ‘Sitemaps’ data via the URL Inspection API integration in Search Console. The ‘Rich Results’ bulk export contains rich results types, validity, severity and issue types. ‘Referring Pages’ includes up to 5 referring pages available for each URL inspected. ‘Sitemaps’ includes the inspected URL, alongside the Sitemap URL(s) it was discovered within.
- Accessibility: All violations or violations at WCAG level. Exports include detailed accessibility issues seen in the Accessibility Details tab, such as issue, guidelines, impact and location on page for all URLs.
- Issues: All issues discovered in the ‘Issues’ tab (including their ‘inlinks’ variants) as a separate spreadsheet in a folder (as a CSV, Excel and Sheets).
- AI: Export Images or Text to Speech Audio files from using the AI models in OpenAI and Gemini that are able to generate them.
Multi-Export
The ‘Multi-Export’ option under the ‘Bulk Export’ menu allows you to select any tab, bulk export or report to export in a single click.
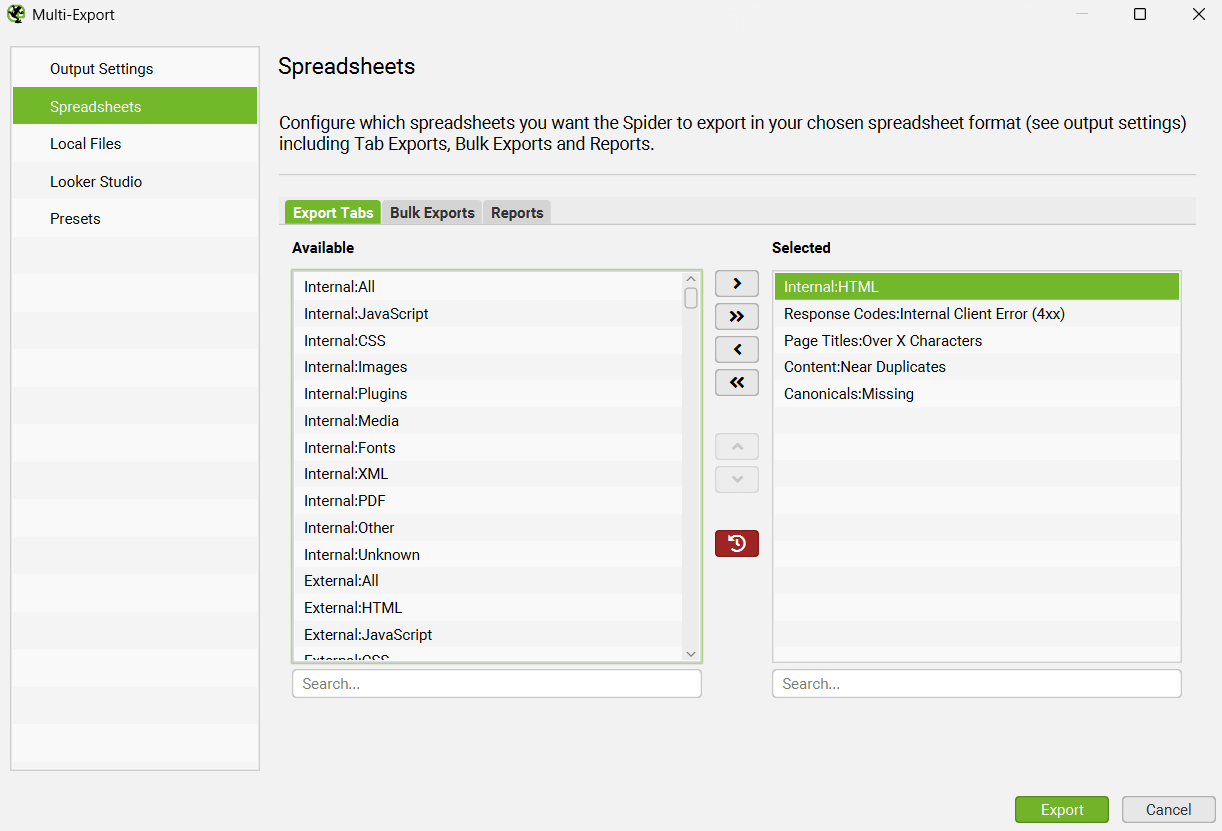
If there’s a common set of reports you use for crawls, or have specific exports for some websites, then you can save them as presets and use them when needed both manually in the UI, or in scheduling and the CLI.
This unctionality also enables you to run the Export for Looker Studio from a manual crawl, rather than only from within scheduling.
Export Format
When you choose to export, you can select the file ‘type’ to save it as. These include CSV, Excel 97-2004 Workbook, Excel Workbook and Google Sheets.
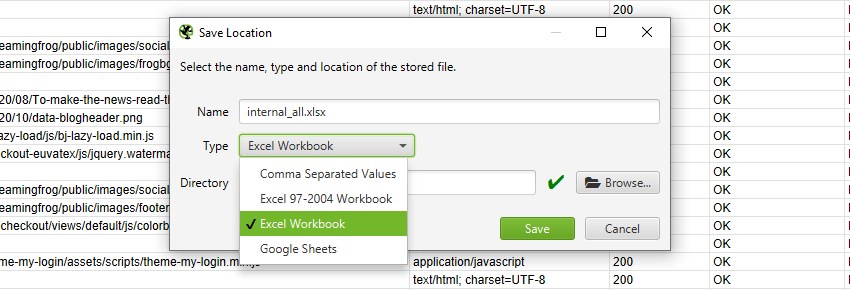
To export as a CSV, Excel 97-2004 Workbook or Excel Workbook, you can select the type and simply click ‘Save’.
To export to Google Sheets for the first time, you’ll need to select the ‘type’ as Google Sheets, and then click on ‘Manage’.

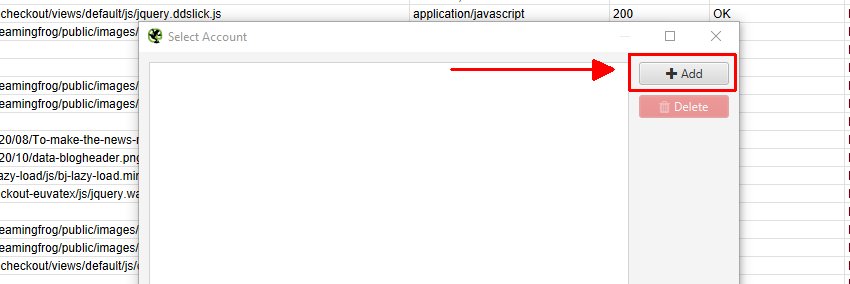
Then click ‘Add’ on the next window to add your Google account where you’d like to export.
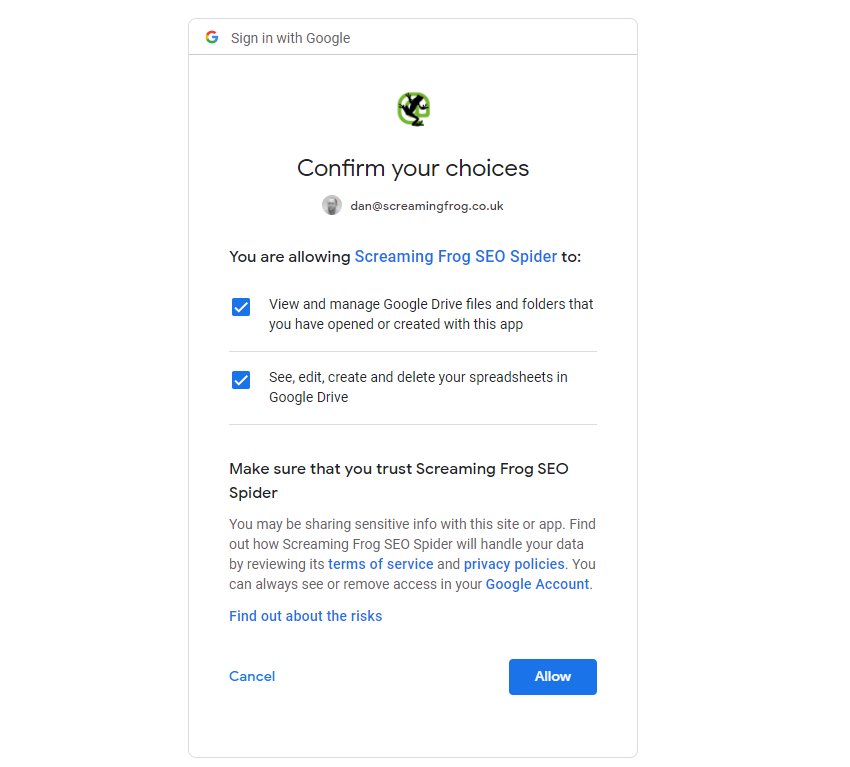
This will bring up your browser, where you can select and sign into your Google Account. You’ll need to click ‘allow’ twice, before confirming your choices to ‘allow’ the SEO Spider to export data to your Google Drive account.
Once you have allowed it, you can click ‘OK’ and your account email will now be displayed under ‘Account’ where you can now choose to ‘save’.

When you do save, the exports will be available in Google Sheets.

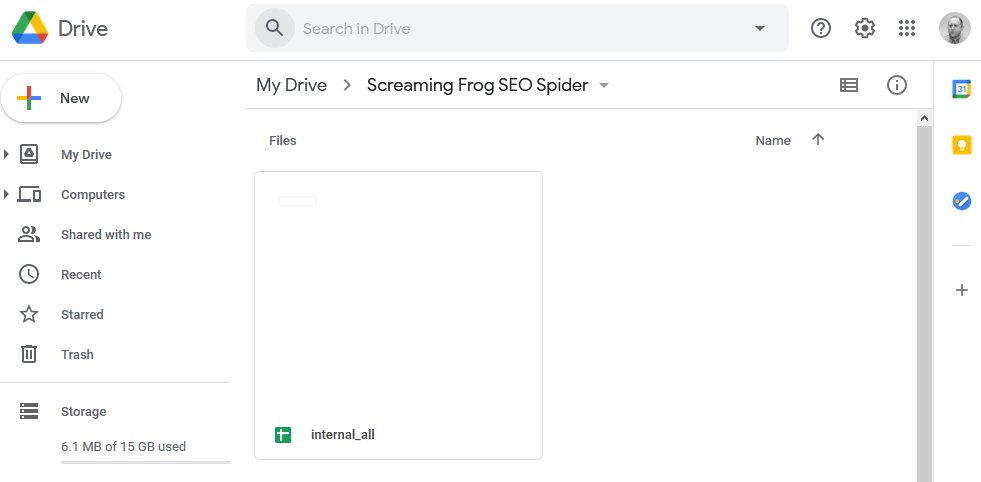
The SEO Spider will also automatically create a ‘Screaming Frog SEO Spider’ folder in your Google Drive account with the export in.
Please be aware, that Google Sheets isn’t built for scale and has a 5m cell limit. By default the SEO Spider generally has around 55 columns in the Internal tab, so is able to export up to around 90k rows before they are truncated (55 x 90,000 = 4,950,000 cells).
If you need to export more rows, either reduce the number of columns in your export, or use a different export format that’s built for the size. We had started work on writing to multiple sheets, but Google Sheets just shouldn’t be used in this way currently.
Google Sheets exporting has also been integrated into scheduling and the command line. This means you can schedule a crawl, which automatically exports any tabs, filters, exports or reports to a Sheet within Google Drive.
The ‘project name’ and ‘crawl name’ used in scheduling will be used as folders for the exports to Google Drive. So for example, a ‘Screaming Frog’ project name and ‘Weekly Crawl’ name, will sit within Google Drive like below.
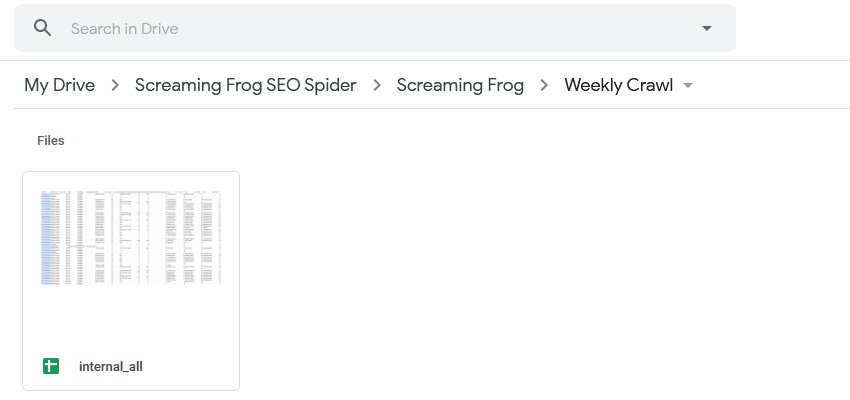
You’re also able to choose to overwrite the existing file (if present), or create a timestamped folder in Google Drive.
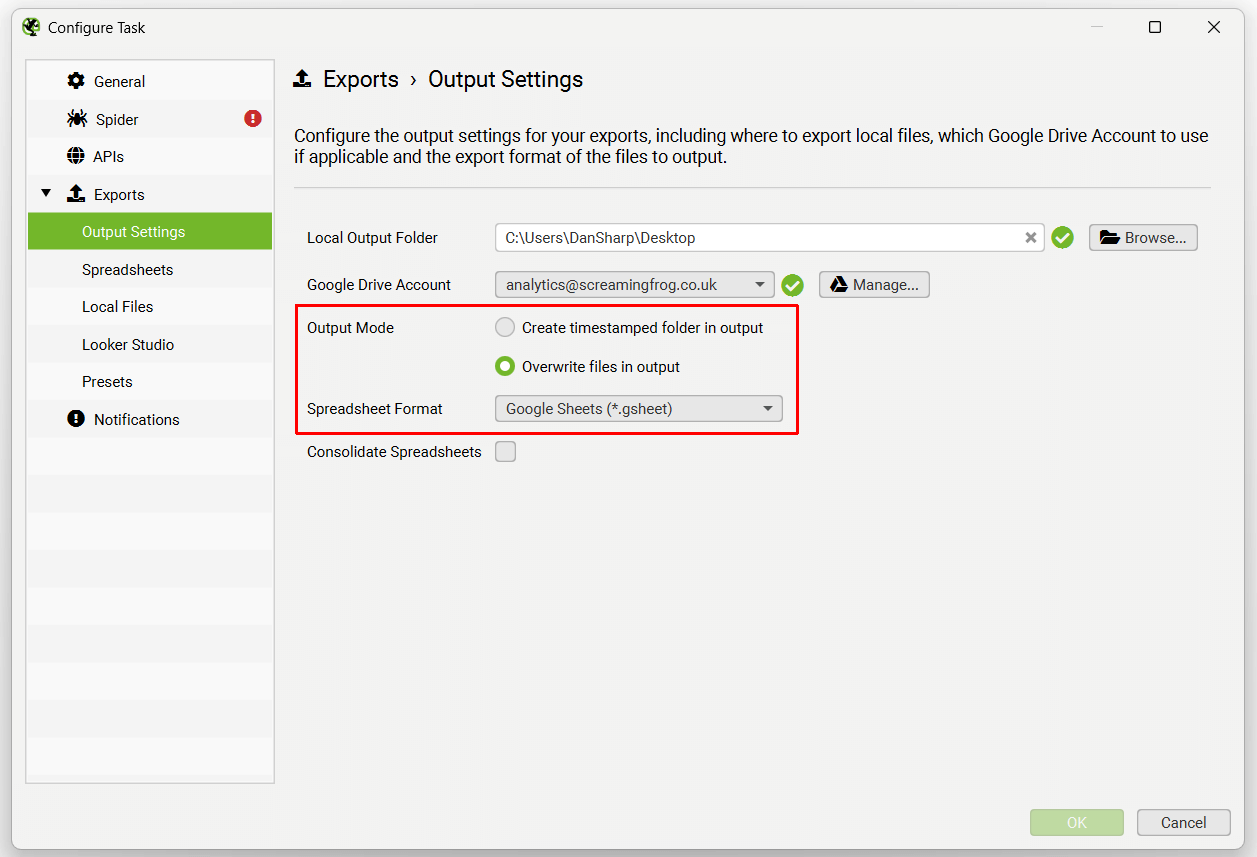
If you wish to export to Google Sheets to connect to Google Looker Studio, then use the ‘Looker Studio’ tab and custom overview export.
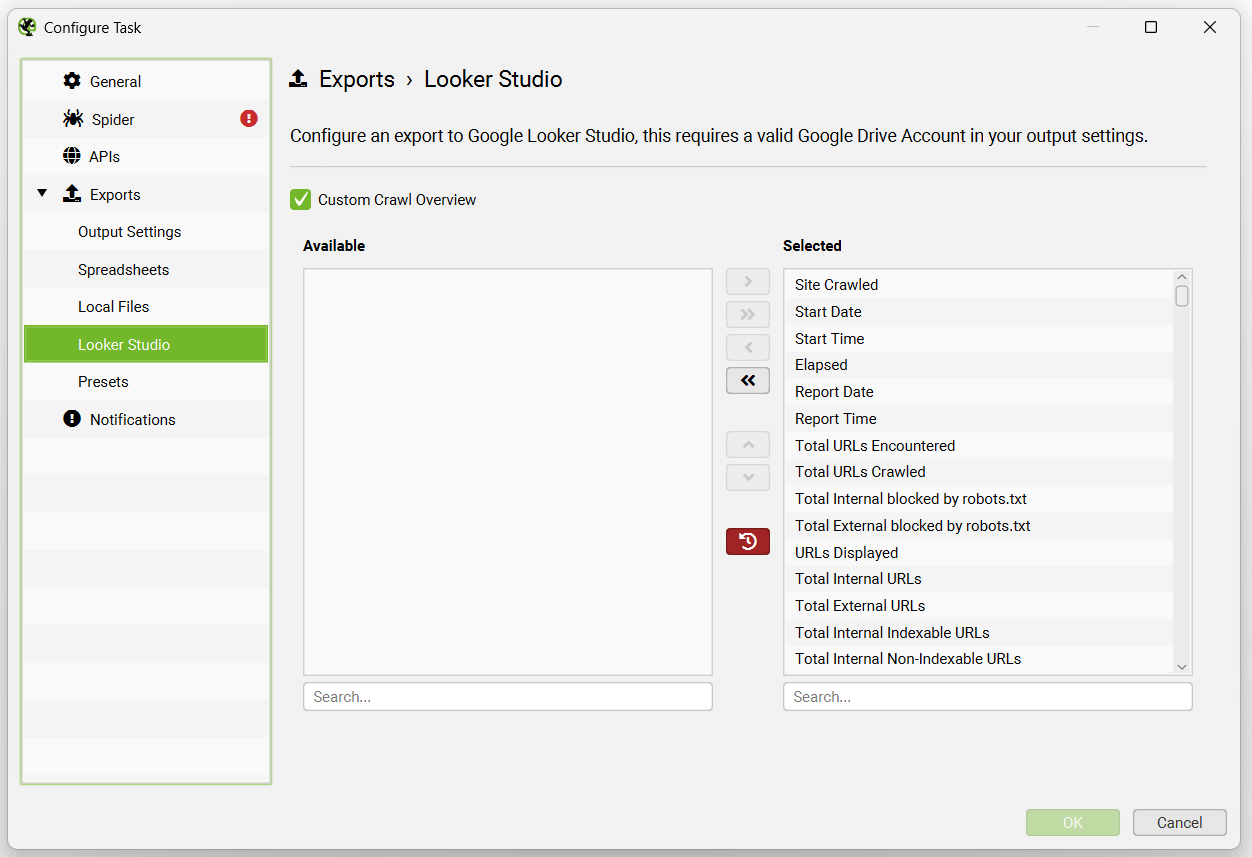
This has been purpose-built to allow users to select crawl overview data to be exported as a single summary row to Google Sheets. It will automatically append new scheduled exports to a new row in the same sheet in a time series. Please read our tutorial on ‘How To Automate Crawl Reports In Data Studio‘ to set this up.
If you’re using database storage mode, there is no need to ‘save’ crawls in scheduling, as they are stored automatically within the SEO Spiders database.


